
The Shipt Shopper app is supported on iPhones (iOS 10 or later) and Android (5.1 or later)— it is not supported on Windows phones or tablet devices at this time. A shopper's phone will need to have a cellular service plan active for data, SMS text, and phone call abilities.
*Note: While the shopper app may work with older operating systems, it will not be fully supported.
Downloading the app
To download the app, search for "Shipt Shopper" in the App Store or Google Play Store or click the corresponding button below. The Shipt Shopper app is titled "Shipt: Deliver & Earn Money" and the icon displays the Shipt logo and a green car.


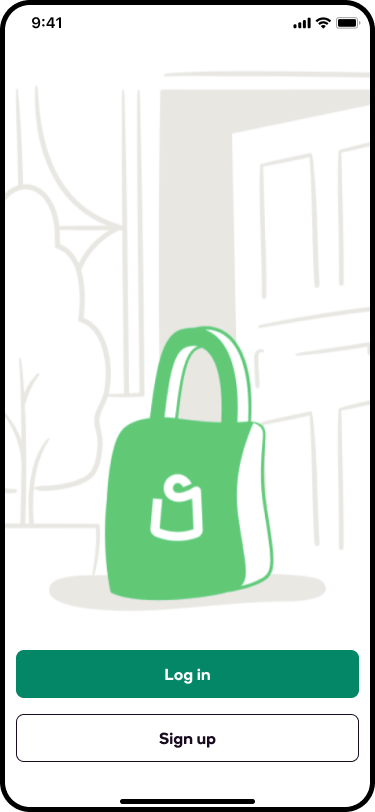
Once you have downloaded the app, you will select Sign up, and then answer some basic contact information questions. If you have a Shipt membership, be sure to enter the same email address associated with your member account when signing up. This will ensure that your shopper and member accounts are linked.
Please note that we cannot guarantee that there will be an immediate independent contractor opening in your area. In the event you are placed on a waiting list, you will be contacted when the next available opportunity arises. Simply follow the instructions in the email that you receive to confirm that you're still interested in shopping with Shipt. If you miss the deadline to confirm your interest, follow the instructions in the email to reclaim your spot on the waitlist, and we’ll reach out again when we’re accepting new shoppers in your area.
Once there is space available, reset your shopper account password.
- You will then receive an email from Shipt with a link that allows you to reset your password. Be sure to check your Spam folder if it does not appear in your Inbox.
- If you have a Shipt membership, you can use the same email and password associated with your member account to log in to the Shipt Shopper App.
- If you didn't receive it or the link has expired:
- Open the Shipt Shopper app.
- Hit the green Log In button.
- Select Set Password toward the bottom of the screen.
- Check your email for a link and instructions to reset your password.
- Open the app, and then enter your email address and new password to sign in.
- Finally, you'll be asked to verify your phone number for account security.
Setting up your account
After you log in to the app for the first time, you'll be guided to the Shopper Signup screen. All of the personal information you enter into the app will be privacy protected. Shipt will only share your first or chosen name, last name initial, and shopper picture with a member after you claim their order.
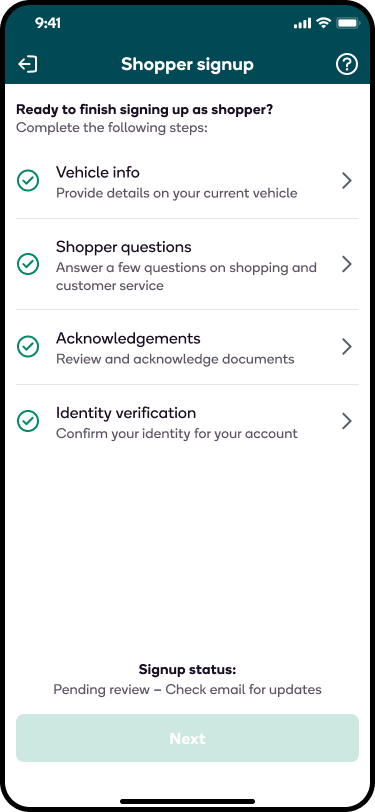
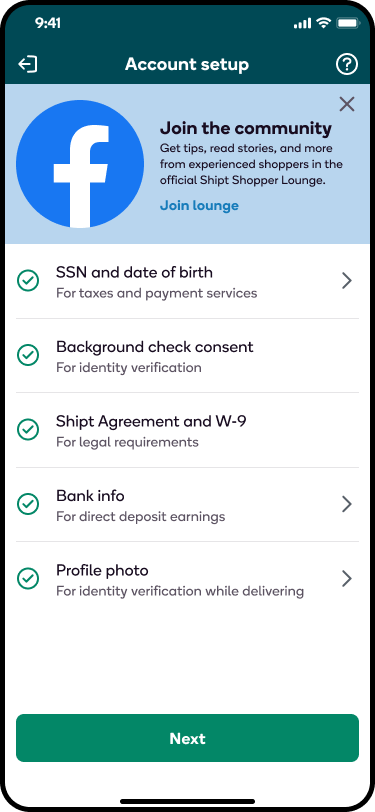
You'll be asked to complete several steps to set up your account, including:
- Shopper Agreement and Policies: This is the contract between you and Shipt regarding your independent contractor arrangement.
- Background Check and Identity Verification: This helps us improve the safety of our platform. For more information, click here.
- Bank Information and Social Security Number: These are needed for security, tax, and payment purposes.
- Shopper Photo: Your photo will be shown to members after you claim their order so they can identify you as their shopper at delivery.
Once you've provided this information, we'll begin processing it, and you can check the status of your sign-up at the bottom of the Shopper Signup screen. If you notice the Shopper signup screen is greyed out, don't worry! This just means there’s nothing more for you to do and your sign-up is in review. Check your email for instructions on next steps.
*Note: The status of your background check will display at the bottom of the Account Setup screen.
Once you're authorized to start shopping, tap Next to get started!
Selecting your location
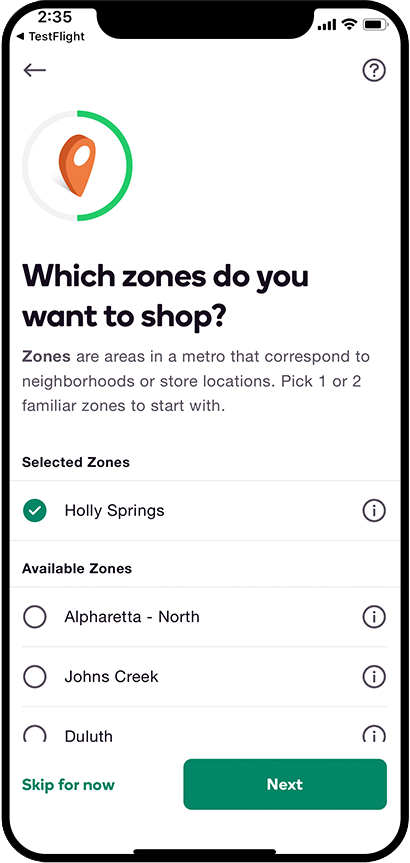
After the Shopper Signup screen, you'll see a screen that asks where you'd like to shop. Your metro (typically your city) will be pre-selected from the information that was submitted during your sign-up process. You will be asked to select your zones (typically neighborhoods).
As a new shopper, it's best to select 1 or 2 zones that you're familiar with to get started. You will be able to add more or edit your selected zones afterward in the app at any time.
- To edit your metro, tap Change.
- Once your metro is correct, tap Next.
- Tap each zone to select it.
- To see what stores are in each zone, tap the info icon displayed to the right of each zone.
- Once you are finished selecting your zones, tap Next.
To view which retailers offer services in your area, click here.
Selecting when to work
After selecting your zones, you'll be asked to select which days you are available to work this week.*
- Tap each day to select it.
- Once you're done selecting days, tap Next.
Then, you'll be asked to select delivery windows. Keep in mind, these are the timeframes in which you are signing up to deliver an order. To ensure on-time delivery, top shoppers recommend beginning to shop before the delivery window.
- Tap each delivery window to select it.
- Once you're done selecting delivery windows, tap Finish.
*Note: If you're unsure of your schedule for the upcoming week, you can tap Skip for now and set up your schedule when you are confident about your availability.

If you have any issues while setting up your app, refer to our App Setup Troubleshooting article.
Enabling Push Notifications
To receive order offers in live time, push notifications will need to be enabled for the shopper app. You will be prompted to enable notifications after logging into the app, however, you can also enable notifications through your device settings.
For iOS Devices:
- On your phone, open the Settings app.
- Tap Notifications.
- Select the Shopper app from the list of apps displayed.
- Enable notifications.
For Android Devices:
- On your phone, open the Settings app.
- Tap Apps & notifications.
- Select the Shopper app from the list of apps displayed.
- If you can't find the Shopper app, first tap See all apps or App info.
- Tap Notifications.
- Enable notifications.
Location Sharing
As a platform enabling deliveries from one place to another, accurate location data is important to both providing service and supporting shoppers. Location sharing is required for shoppers with Shipt, and you will be prompted to enable location permissions for the shopper app if you don’t already have them enabled.
*Note: You will not be able to access or claim orders until location permissions are enabled.
- Location sharing helps ensure the most accurate information possible is available for all shops and enables Shipt to explore more features that can help shoppers and customers connect.
- Your location data is only collected while using the shopper app, is stored securely, and is only used for operational purposes.
- Enabling location sharing will not significantly impact battery consumption.
You may access your device setting from the in-app prompts when you encounter them, or head to your device settings to ensure your location permissions for Shipt are enabled.
For iOS Devices:
- On your phone, open the Settings app.
- Tap Privacy.
- Tap Location Services.
- Select the Shopper app from the list of apps displayed.
- Select While Using the App or Always.
- Toggle on Precise Location.*
*Note: For iOS devices, precise location must be enabled for accurate location sharing.
For Android Devices:
- On your phone, open the Settings app.
- Tap Apps & notifications.
- Select the Shopper app from the list of apps displayed.
- If you can't find the Shopper app, first tap See all apps or App info.
- Tap Permissions.
- Tap Location.
- Select All the time or Only while using the app.
After allowing your location to be shared, you will be prompted to allow motion access during your next shop. While motion access is not required, it is highly recommended for shoppers because it will help preserve your phone battery while sharing your location.
App Setup FAQ
Can I update my information after I have set up the app?
- Your personal information, payment information, and metro selection can be updated on your Account page in the app. Zone selections can be updated on your Schedule. Keeping all of this information accurate and up-to-date is important to ensure there are no issues with your payments, member communication, or order offers.
*Note: Your SSN will not be accessible in the app after submitting it during setup.
Can I use the Shopper App on multiple devices?
- You are able to download the app and log in on multiple devices to check your stats or claim orders. However, when shopping, the app should only be active on the mobile device you will be using. Be sure to update your phone number if you need to change devices to ensure the masked number system works properly when you contact the member.